If your WordPress website or blog has an event calendar plug-in, such as the All in One Event Calendar, this tutorial will show you how to add an event.
In this example I’m using the All-in-One Event Calendar plug-in:

Go to the Events section on Your WordPress Dashboard
You can hover over “Events” and click “Add New”, or maybe “Add New” is already underneath Events because it’s expanded (like in the picture below). Either way, click on “Add New”.

Enter a Title
When the new events page comes up, start filling out the pertinents. See where it says, “Enter title here”? Guess what goes in there. The name of your event, like, “Joe’s Networking Brew-haha”, or something that actually exists, like SacTweetup.
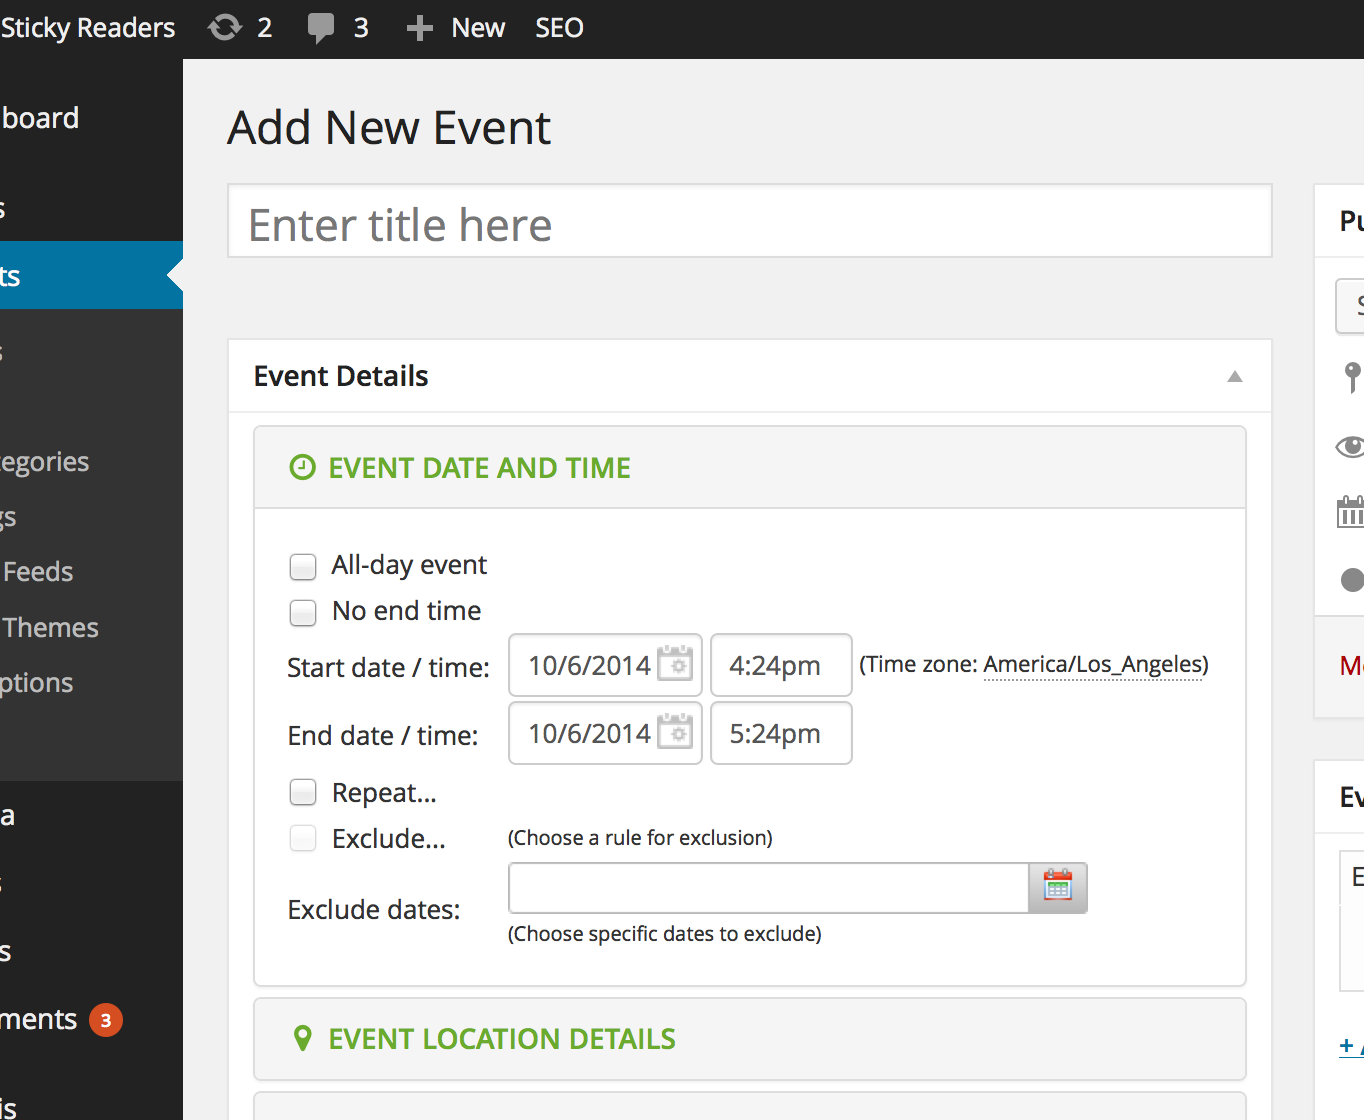
WARNING: Do NOT put the location in the title field.
In other words, don’t say, “Joe’s Networking Brewhaha at the Zoo”. Why? Because “The Zoo” will appear in your summary from the location field you will be filling in later which means your summary would read: Joe’s Networking Brewhaha at the Zoo at the Zoo, and boy won’t you look silly then?
The rest is pretty self-evident, but if you want to see pretty pictures, we’ve got ’em.
Fill out Event Date & Time fields
If it’s not already expanded, click on “EVENT DATE AND TIME”
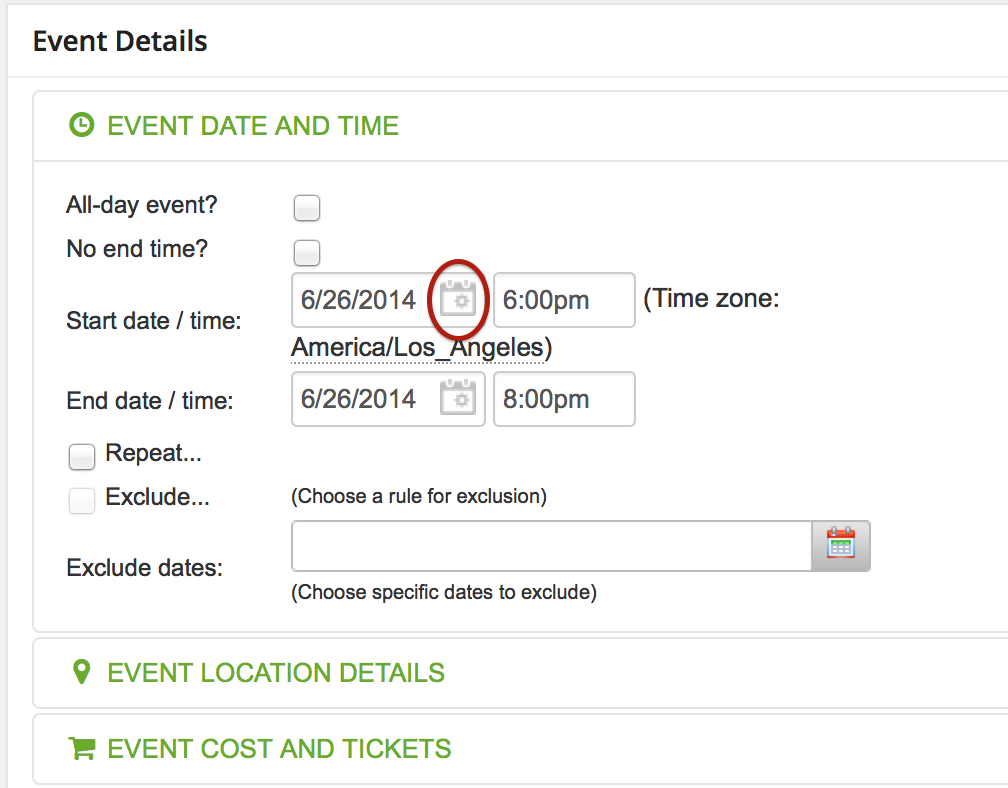
See the red circle? If you click on that, it will pull up a calendar for faster date choosing:

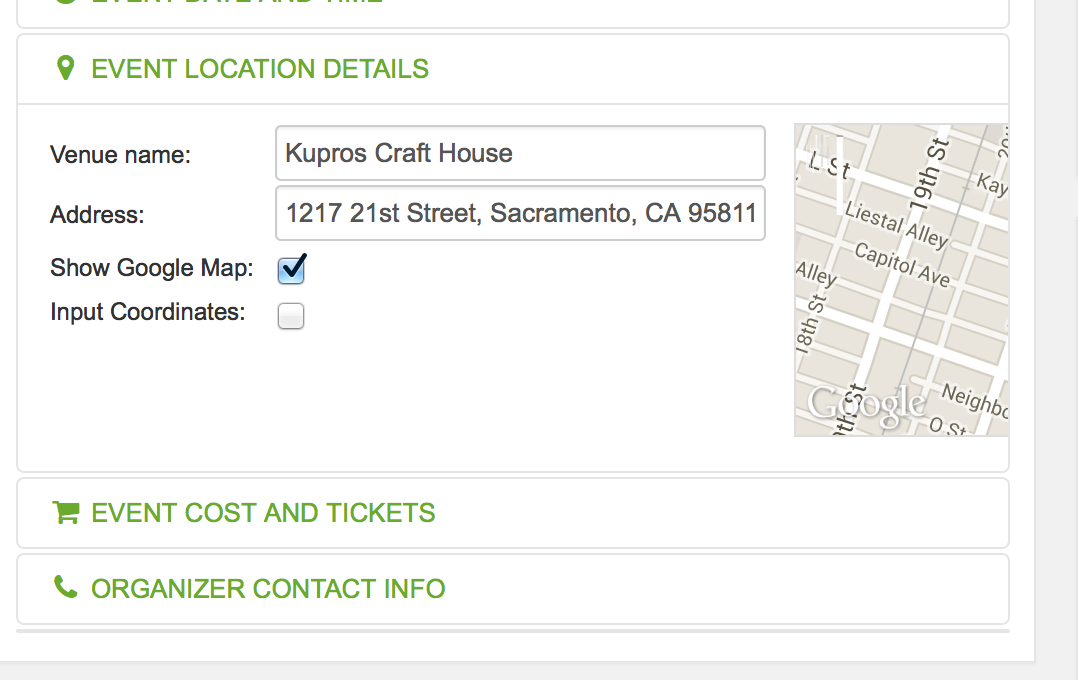
Enter Venue Name and Address
Click on EVENT LOCATION DETAILS to expand that section. Then you can enter the venue name and address. If you check the box “Show Google Map” it will bring up a handy dandy map for your readers.
Do not check the box “input coordinates”. Otherwise this will happen:

Really? You want to see the longitude and latitude? Whatever, it’s your event.
Enter Event Cost and Tickets

Is the event free? Then say so! Be sure to include the link to the event page, or the purchase tickets page, if there is one, in the “Buy Tickets URL”. I would also advise putting the link in the body of your details section later as well.
Enter Organizer Contact Info
Click on the ORGANIZER CONTACT INFO line to enter that information.

Do you want people hounding you with questions about your event? Then by all means fill out this information. Personally, I’d leave it blank as I am a misanthrope and hate people with their silly questions and don’t want to talk to them. But you…if you’re as helpful as people say you are, you’d better put something in there. Or better yet, hire an intern to do that for you and stick their email address in there. Ha! Yeah, do that.
Enter Event Description and Other Details
Below the “Event Details” section is the part that looks an awful lot like a new blog post entry. You can treat it as such. Put whatever you want in there, including images if you like.

You can also select a category from your right sidebar if you wish which can be helpful if you have a lot of events lined up and want your readers to be able to filter them into categories, such as “events” or “workshops” or “alien visitation opportunities”.
Otherwise, you’re done.
Publish Your Event
Hit Publish and go to your calendar to make sure everything looks OK.